Tuesday, November 30, 2010

Woodland Mantel

I thought I was done with my mantel a few days ago but it just didn't feel right. So today I took it all down and started again. I kept it really simple with some greenery and pinecones. I think the German glitter glass sign adds just the right amount of sparkle, along with the snowy pinecones I glittered here.


Now I am a wood burning fireplace kind of girl...the warmth, the crackle and the ambiance is so very nice, especially around the holidays. If you are new here you should know there is none of that going on at 65th avenue, sad, I know. I do have fun decorating the mantel for the different seasons though. If you would like to see the mantel before it got some chalkboard paint, click here.


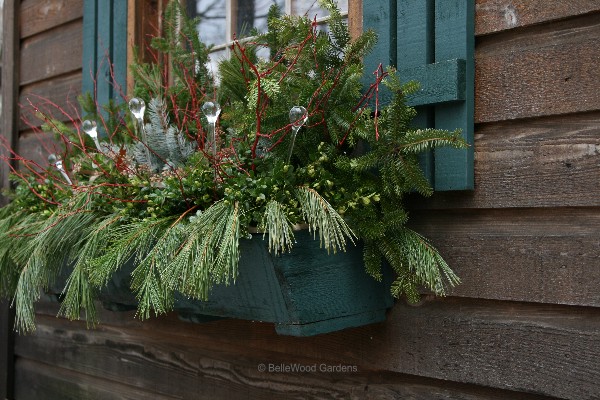
I bought the garland from PB a few years ago on clearance. I used to use fresh greens but I hated having to wait until the week before to decorate the mantel.


The trees are from Hobby Lobby. The last few years I used tall candlesticks, but they have been hanging out all year so I needed a change.


Is it just me or does this sign remind you of the movie It's a Wonderful Life? One of my favorite movies of all time!


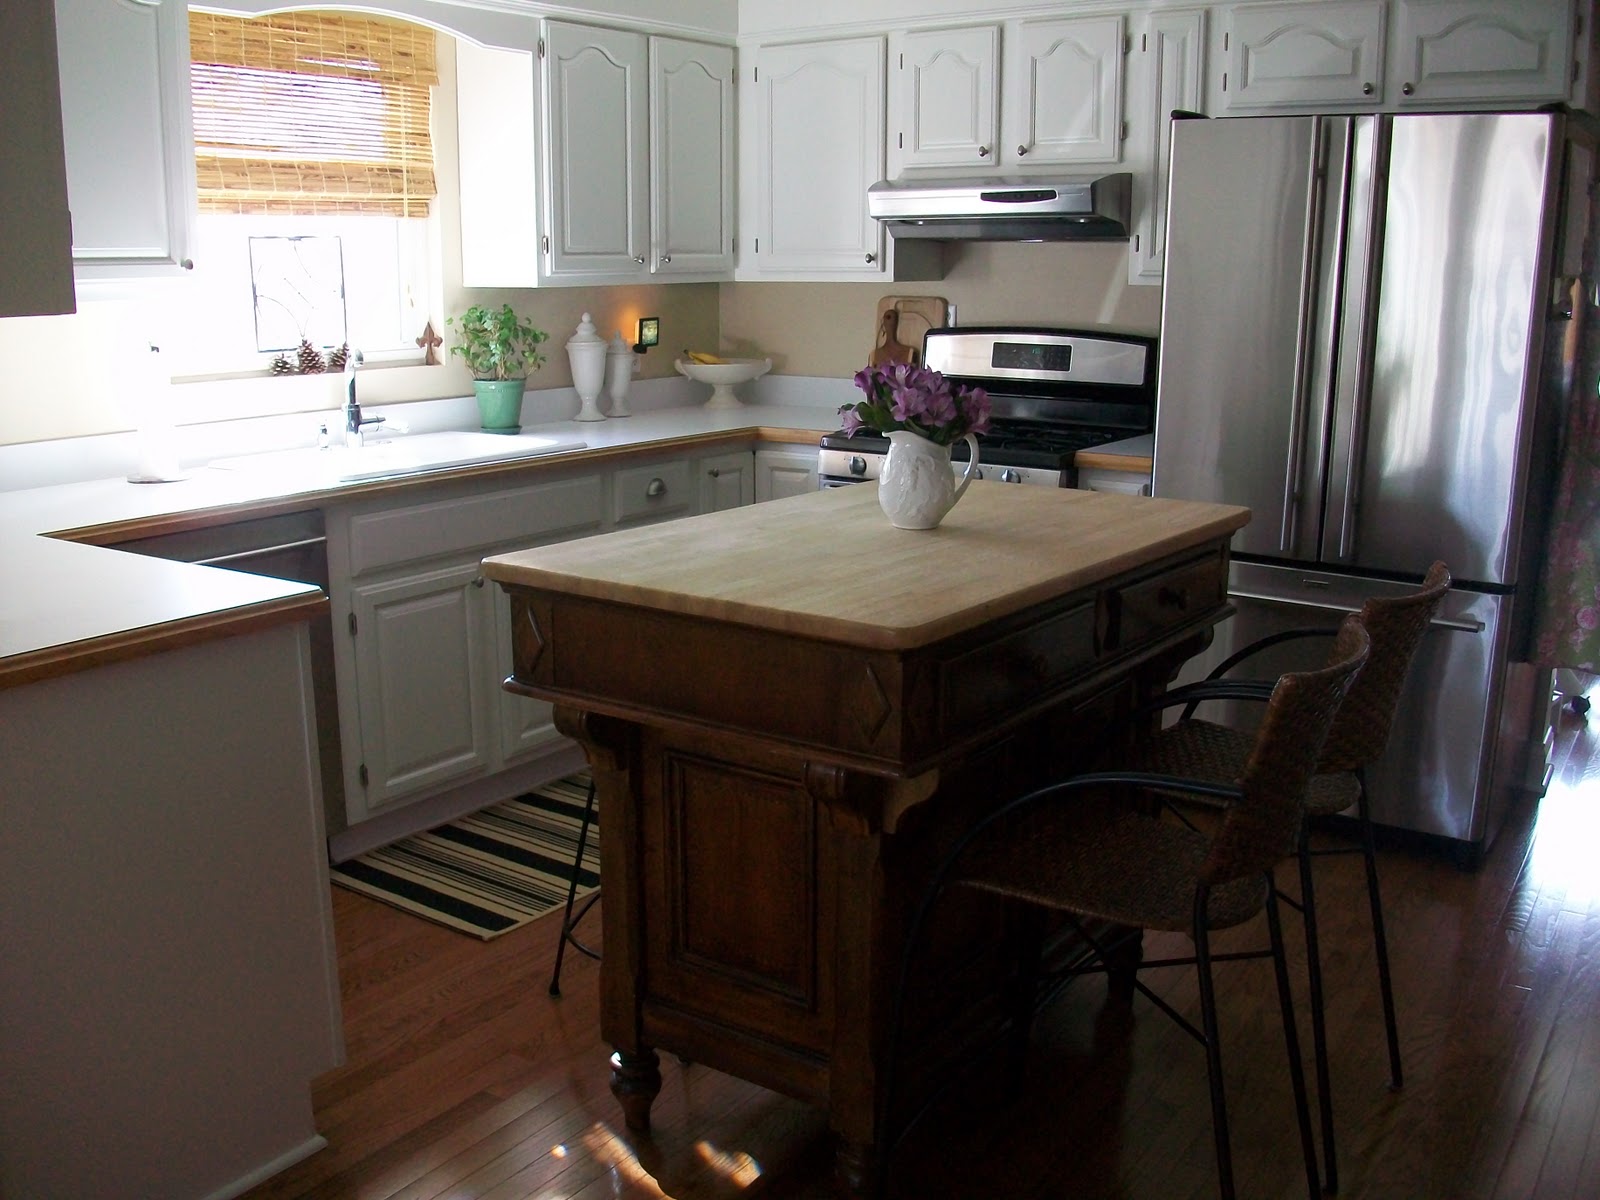
Here is the other side of the room when you can see the dining room table. Right now it's acting as Christmas central until I finish putting everything together. What a difference good light makes, this picture was taken on a sunny day. Today we had none.

Sharing with Christmas Cheer Challenge @ Perfectly Imperfect
My Uncommon Slice Of Suburbia

Head over to The Lettered Cottage for more mantel inspiration!

The Lettered Cottage
Visit thecsiproject.com

Monday, November 29, 2010

O Christmas Tree....

O Christmas tree...why are you so difficult to photograph?

Taking a picture of a huge tree inside my house has not been an easy task! Throw in a Kodak point and shoot cheapo camera and it doesn't get any easier. I started reading some tips online after looking through all my pictures and not finding single good one. I even kept the tripod out and took pictures at different times of the day....no luck.


Here is a little peek until I can figure this out. Have any tips? Please share! 

Friday, November 26, 2010

A Holiday Tradition

Hello everyone, did you have a nice Thanksgiving? We spent the day at my Mom's house. We enjoyed a delicious dinner and had a lot of fun with family. The day after Thanksgiving is the day we go out looking for the perfect Christmas tree. 


Today was the coldest day of the season, needless to say this face didn't stay this happy for very long. We found our tree in record time because of it. It's one of our best ones too.


Our first Christmas together Mr. 65th and I bought a tree from a tree lot; we got a bad one because it shed about a million needles in one day. The next year we went to a tree farm and cut our own tree down; it was so fresh, it lasted longer than the holidays. This is our eighth year getting our tree this way, it's a lot of work but worth it to us. Every year our tree is different and it smells so good!


There is still some debate about which is more "green"....cutting your own or buying fake. If anyone wants more information I can share some pros and cons, just let me know. Oh and yes, needles still drop, but they are cleaned up easily when I vacuum.


Mr. 65th makes sure the tree is well lit; then I take over and decorate it with all the ornaments. We make a great team. ;)


Now we're exhausted and ready for bed...it's been a long day decking the halls. I'll share some pictures with you soon. Enjoy the rest of your weekend. xo

Wednesday, November 24, 2010

Wishing you a wonderful Thanksgiving!


Monday, November 22, 2010

Let it snow

I love having a little bit of sparkle to go with my Christmas. I just never knew how to get that snowy look until now, and it's so easy and quick.


Pinecones were the perfect thing to try out first because I had a bunch of them still sitting outside from one of our nature walks.

Here are the supplies you will need to get yourself that perfect snowy shimmer. Elmer's glue, white paint (I used flat), glitter and diamond dust. The "glitter" is more like tiny ice crystals than typical glitter. The diamond dust is similar, it just has a subtle shimmer to it. I bought mine at Hobby Lobby.


I mixed my glue and paint together using a little more glue than paint.


Then I painted my mixture on here and there...


I had a little helper sprinkling on the glitter followed by the diamond dust.

Shake them off and you're done.


While the pinecones were drying, I looked around for something else to do. I bought this believe sign a couple years ago with plans to spruce it up but never did until now.


I painted on my mixture and sprinkled the glitter over a big bowl. It took me about five minutes and I love how it turned out. Can you believe it? ;)


I've seen this done on garland and wreaths and it looks beautiful. I'm off to finish decorating my mantel. Have you started early this year too?

Linking to
Visit thecsiproject.com

The Frogtape winner is...

The Brick Cottage

Congratulations! Please email me your mailing address and I will send off your package.

Thursday, November 18, 2010

Winter Pillows

With winter being around the corner, I wanted to cozy up my couch with a couple new pillows. Last spring I bought a few from Pottery Barn and loved them. Once you invest in the pillow inserts buying just the covers can be pretty reasonable. The covers are washable and the down inserts make then perfectly squishy.


After trying out a few different combinations I decided to go with white and off white, now I just need a warm throw blanket and we'll be all set. It's getting pretty chilly here in Chicago and we like to cuddle up on the couch, especially in the morning.


Some of you might be thinking white pillows and kids don't mix very well. But they can...we don't snack or eat anywhere but the kitchen or dining room and hands are clean before we leave the table. Having this one simple rule has kept our furniture in great condition over the years.


We usually don't decorate for Christmas until the day after Thanksgiving, but I wanted a head start this year. It takes me longer than it should to get everything where I want it. I guess that's because I keep moving things around....this table has changed a couple times already. I'm thinking the pine cone needs a little sparkle.

I just found out the secret to get that snowy sparkly look and it's so easy. I'll share it with you soon!

Sunday, November 14, 2010

More Chalkboard Talk And A Giveaway

I waited three long days to let the paint cure before writing on the chalkboard wall. First I conditioned the surface by rubbing the side of a piece of chalk over the entire wall. Then I used a towel to wipe it off since I was doing a large area, you can use an eraser if you want. Doing this will leave a coat of chalk dust so you will have the best erasability.


Painting the wall was the easy part; this step was a bit of a pain because of how much I had to do. And yes, it did make a big chalk dust mess.


Wiping it all off was my favorite part. I love the finish of a chalkboard and now it was starting to look like one and not just a black wall.

My main concern was getting clean lines along the wall and ceiling. Usually I can't be bothered to use painters tape because there is always bleed through, so I just take my time instead. But black paint is unforgiving and I knew I wouldn't be able to get it perfect so I used Frog tape. I had good results with it when I used it on the mantel so I tried it again and crossed my fingers.


I really couldn't believe it when I pulled all the tape off...I had perfect crisp lines! I was really impressed.


Frogtape has generously donated a gift bag to one of my readers! It comes with three different size rolls of tape, a t-shirt and a bag.

Leave a comment on this post for a chance to win.

For a second entry, become a follower of my blog. Leave a separate comment telling me you did so.

Giveaway will close at midnight central time Friday November 19th. I will announce a winner on Monday. Good luck!

Thursday, November 11, 2010

Chalkboard Wall Take Three

After much thought the other morning, I decided to go for it and put the second coat of chalkboard paint on the kitchen wall. I really didn't give it a chance and the first coat was already done...so I went for it.


I kept the framed chalkboard up for our ever changing lists and notes.


It really is dramatic don't you think? I had quite a few great comments that suggested leaving a big rectangle of chalkboard and paint the rest the original color. I like that idea and you never know I might end up doing that after the holidays.


Remember the plates I found at an estate sale over the summer? Well they finally found a home above the cabinets with a couple ironstone pitchers. I only had two dinner plates and needed a third so I glued one of the little ones onto a platter I found at Target.


 We use this little dell computer to drive all of our music wirelessly. This is my husband's baby; he loaded over thirteen hundred CDs and has plans to load all of our albums too. This will allow us to use our "Music Room" for actual storage since it really is just a closet, but that's a story for another day.

We're really looking forward to decorating our new wall for the holidays.

Monday, November 8, 2010

Loving This Idea

Hello everyone! I got up yesterday and read all your comments about the chalkboard wall. Thank you everyone for your suggestions and honest opinions, I LOVED reading them all! I feel so lucky to be part of this amazing blog world!

I was on the fence again yesterday and the wall was still the topic of conversation here at 65th Avenue...but I made a decision and went to work painting it. Part three coming soon to reveal the final color.

Today I will be taking inventory of my old books to make this Christmas tree.

Real Simple 

A friend of mine who gets the Real Simple magazine called me to ask if I saw this picture....she said it had my name written all over it. She was right, I love this idea! I think a trip to Goodwill and a few thrift shops is in my very near future for more books.

 My goal this week is to finish getting organized so I have a clean slate to work with when the Christmas decorations come out. Here's to a productive Monday!

Saturday, November 6, 2010

Chalkboard Wall Part Two

Ok, so I did it, the whole wall in the kitchen is painted black with chalkboard paint.


After getting one coat done I stepped back to take a look and there was a humongous wall staring back at me. This was going against everything I've ever tried to do in this house...open it up and make it feel light and airy.


One of the first things we did when we bought this house was open up the tiny doorway between the living room and kitchen. It was one of the best things we ever did and allowed us to have a kitchen island.


I figured because I was painting a small wall it would be fine. It wasn't, instead of the doorway feeling open like it did, it felt closed in.

Here is another before...


And after...


Sadly, I'm going to paint it back the way it was. Mr. 65th wants to keep it so we can have fun with it over the holidays. He already had a fantastic idea to draw Santa and his sleigh on this wall and a few reindeer flying over the doorway with Rudolph leading the way, but it's already taped so I'm hoping to just paint over it and all will be ok....I really don't want to paint the ceiling right now.

This will be a great test for the frog tape I used. If I'm able to paint it black then back to the original color with two coats and not have bleed through along the ceiling it will be a miracle! Aura paint from Benjamin Moore has a built in primer, I used it in this room originally so we shall see how it performs going over black.

I still love idea of a chalkboard wall but for me this just isn't the right spot for one. You probably weren't expecting this were you? Maybe in a different house I will have the perfect wall to draw on.

Thursday, November 4, 2010

Chalkboard Wall Part One

I decided to go for it and paint a chalkboard wall in the kitchen. I think it will always be in the back of my mind if I don't give it a try.


I taped everything off with frog tape....


And started trimming around the edges...


I would be lying if I said I wasn't a little nervous about the outcome....


Stay tuned for part two!

Monday, November 1, 2010

Winter Window Boxes

I don't have a very nice view from my kitchen window so I try to keep something pretty in the window box year round.


I bought a bunch of mini mums to plant for fall but they hung out on the buffet in the kitchen for too long and never got planted.


Now that I have an empty window box I can't help but think about what I'm going to do for the upcoming season. If you live in a cold climate your winter display can last through the winter.  

I found some great window boxes to inspire us....


I love the glass ornaments and dogwood branches used in this display.


Pinecones are one of my favorite things to decorate with for the holidays.


The icicles hanging from this box are a fun idea. You can use beaded ornaments or garland for this look.
Martha Stewart

I love this shed all decked out for the holidays. Last year I added some greens and a wreath to the playhouse just for fun.


When putting together your winter display it's best to start when the soil is still workable and not frozen. I like to use a few different varieties of evergreen branches to start with. Snip a few inches off of the bottom of the branches to keep fresh and push deep into the dirt so the wind won't take them away. Once your window box is finished, water it. The water will freeze, holding everything in place throughout the winter. If it warms up a bit, keep it watered until the temperature drops below freezing.

Will you be dressing up your windows this winter?


Site design by FABULOUS K CREATIVE